| How to Create an Initial Assessment Report |

|
| The Assessment Report (NutriBase Professional and higher) is a client-specific report that allows you to generate a customized multi-page Initial Assessment Report.
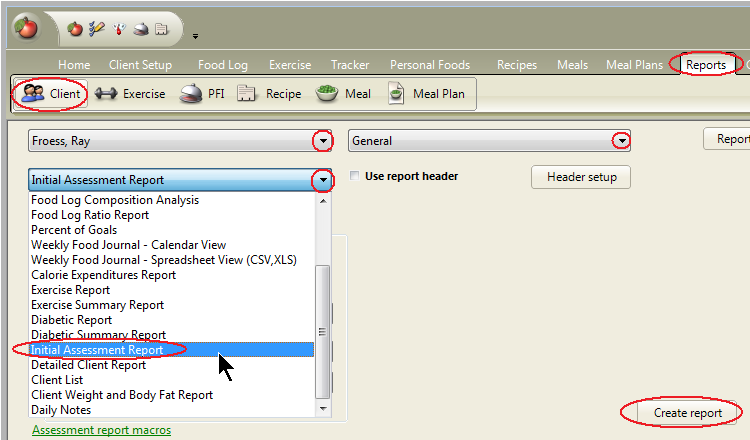
To access the Initial Assessment Report capability, click the Reports Tab, then select the client for whom this report will be. (Change Folders as needed by clicking the down arrow… The General Folder is selected in the image below.)
Select a report type of Initial Assessment Report. To generate an assessment report, click the Create report button. Modify the Initial Assessment Report Template NutriBase macros are strings of text that act as placeholders for other information. This allows you to create a customized report template that will suit a wide variety of clients. Every NutriBase macro begins and ends with a caret symbol (^). For example, the macro ^LastName^ is a placeholder for the selected client's last name. And ^Salutation^ is the placeholder for the selected client's salutation (Ms. or Mr.) as appropriate for their gender. Any time you see ^LastName^ in your Template File, it will be replaced with the client’s actual last name in the final report that you create. To create a new assessment report template, open an existing template file; edit it as desired, then us the Save or Save As option. You can use the same macro as many times as you wish throughout your report. You can add macros as desired to include additional information. Anything you type literally will appear in your report as is. To see a list of all the macros available to you, view the Macros for Assessment Report Topic in this Help File. Make sure the template you want NutriBase to use is selected in the drop down menus provided. You can create several templates for each client situation (whether they are trying to lose, gain or maintain their body weight) and these drop down menus let you select the template you want to use for this particular report.
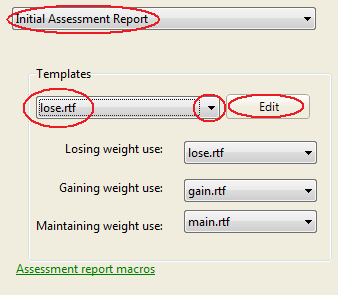
Initially, there are three template files for you to edit. The assumption is that you will provide clients with different information depending on whether they wish to lose, gain, or maintain their current body weight. You may add as many new template files as you require. To see the relationship between the template file and the actual assessment report, first look at a template file… then look at the report that it produces. Notes: 1) We recommend you generate a report after you edit a template to assure it is error-free. 2) If you misspell a macro, it will appear in the report as UNDEFINEDMACRO. If you see this in your final report, take note of where it appears and fix it in your template file. 3) If you are missing a ^ (caret) symbol in your template, you will have problems. Every macro must have one and only one caret symbol at the beginning and one and only one caret symbol at the end of each macro. 4) When the UNDEFINEDMACRO note appears in your report, the remaining macros may become unreliable.
|
 Reports ending in RTF (a generic word processor format). You can open an RTF with MS Word if you like and you can save it in Doc or Docx format if you want to. Reports ending in HTM are HTML formatted - these are web page formats.